Key Takeaways
- Choosing the Right Materials: Selecting appropriate yarn and tools for your project.
- Basic Crochet Techniques: Mastery of basic stitches needed for rectangular shapes.
- Pattern Adaptation: Converting square patterns to rectangle patterns effectively.
- Finishing Tips: Techniques for final touches and detailing on your blanket.
- Maintenance Advice: Care tips to keep your blanket in the best condition.
Crocheting a rectangle blanket is a versatile project that suits both beginners and experienced crocheters.
Rectangle blankets are ideal for a variety of uses, from baby blankets to full-sized throws. Understanding how to crochet a rectangle involves straightforward techniques that you can adapt to any size or type of yarn.
This guide will cover everything from selecting materials to finishing techniques, ensuring you can create a cozy, custom blanket perfect for personal use or as a heartfelt gift.
How to Crochet a Rectangle Blanket
-
Starting Off:
- Begin with a foundation chain; the length of this chain will determine the width of your blanket.
- Use a simple stitch like the single crochet for the entire blanket or mix in patterns like the double crochet for texture.
-
Building the Rectangle:
- Continue adding rows until you reach the desired length. Ensure each row begins and ends with the same stitch pattern to keep the edges straight.
- Count your stitches regularly to maintain an even rectangle.
-
Adding a Border:
- Once your desired size is achieved, consider crocheting a border around the entire blanket. This can be a single crochet border or something more decorative like a scalloped edge.
-
Converting Square to Rectangle:
- If you start with a square pattern, extend two opposite sides to transform it into a rectangle. Adjust the stitch count as necessary to maintain the shape.
How to Turn a Square Crochet Blanket into a Rectangle
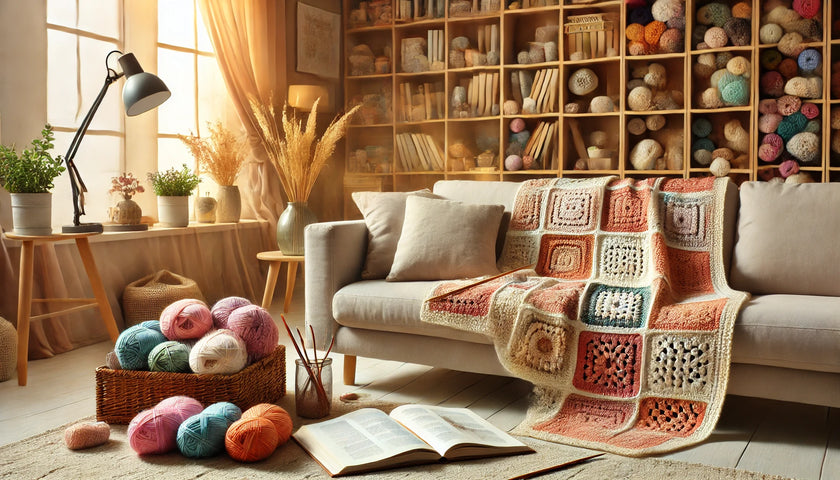
Turning a square crochet blanket into a rectangle is a fantastic way to adapt an existing project to new needs or to correct dimensions if you initially misjudged the size. To transform your square blanket into a rectangular one, you can extend two opposite sides. Here’s a simple guide:
-
Assess Your Current Project: Lay out your square blanket and decide which sides you want to extend to turn it into a rectangle. Typically, you’ll choose to extend the top and bottom or the two side edges.
-
Choose a Matching Yarn: It’s important to use the same yarn or a closely matched yarn in weight and color to ensure consistency in the look and feel of the blanket.
-
Begin Adding Rows: Start crocheting additional rows on the chosen sides. If your blanket’s initial design allows, continue using the same stitch pattern for a seamless extension. For a more defined extension, you might consider a contrasting stitch pattern that complements the original design but highlights the newly added sections.
-
Measure for Symmetry: As you add rows, regularly measure the blanket to ensure that both extended sides are even, maintaining the rectangular shape. Keep adding rows until you reach the desired dimensions.
-
Finalize Edges: Once you’ve added sufficient length, you may need to add a border around the entire blanket to unify the design and ensure that the edges are neat and reinforced.
This method not only enhances the functionality of the blanket by altering its shape but also provides an opportunity to reintroduce the project with a fresh perspective or additional decorative elements.
Crafting your rectangle blanket can be as satisfying as sinking into a Puffy Lux Mattress, with both providing an unmatched level of comfort and relaxation.
Material Needed to Crochet a Rectangle Blanket
Gather your supplies:
- Yarn: Choose a yarn that suits the blanket’s purpose—soft cotton for babies or warmer wool for colder climates.
- Crochet Hook: The size depends on your yarn choice; a larger hook will make a looser weave, while a smaller hook will make a tighter weave.
- Scissors and Yarn Needle: For cutting yarn and weaving in ends.
Enhancing Your Rectangle Blanket Design
- Incorporating Texture: Introduce different crochet stitches like the basketweave or ripple to add texture to your rectangle blanket. These stitches can make the blanket more visually interesting and tactilely pleasing.
- Color Blocking: Use color blocking to create bold or subtle patterns within your blanket. This can add depth to the design and make each section distinct, providing an opportunity to personalize the color scheme to match room decor or personal preferences.
Pair your beautifully crafted rectangle blanket with the luxurious comfort of a Puffy Cloud Mattress for the ultimate cozy setup in any room.
Conclusion
Crocheting a rectangle blanket offers endless possibilities for customization and creativity, making it a versatile project suitable for many occasions.
Whether you’re looking to craft a lightweight throw for summer nights or a heavier comforter for winter warmth, the basic techniques of rectangle blanket crochet remain the same.
By following these detailed instructions and exploring various design elements, you can create a functional and stylish blanket that stands out.

- 8 layers of cloudlike luxury.
- Medium-plush feel.
- Gel-infused cooling.
- 101-night sleep trial.


