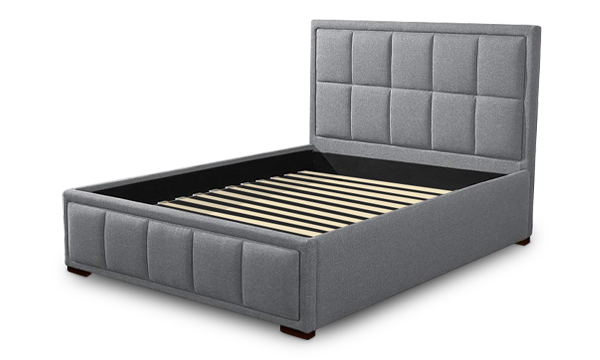
Transforming your bedroom space into a cozy, stylish haven doesn’t have to be a pricey endeavor. For those of us with a penchant for DIY projects and a love for the sleek, modern look of metal, creating a DIY metal bed frame is an exciting challenge.
Not only does it add an industrial charm to your bedroom, but it also provides a sturdy foundation for your mattress ensuring restful nights in a bed that perfectly suits your style and comfort needs.
How to Build a Metal Bed Frame
Materials and Tools Required
- Metal tubing (steel or aluminum), typically 1-2 inches in diameter for the frame and legs.
- A welding machine, safety gear (gloves, welding helmet, apron).
- Metal cutting tools (e.g., angle grinder, metal saw).
- Measuring tape, marker, and square for precise measurements and cuts.
- Sandpaper or a metal grinder for smoothing cut edges.
- Paint or powder coating materials for finishing.
Steps to Construct
-
Design and Planning: Start with a clear design in mind. Measure your mattress and decide on the dimensions of your bed frame, accounting for any additional space you might want around the mattress. Sketch your design, noting the lengths of tubing required for the frame, legs, and any additional supports.
-
Cutting Metal Tubing: Cut your metal tubing according to your design specifications. Ensure each piece is measured twice and cut once to avoid mistakes. Use a metal file or grinder to smooth out the cut edges, preventing any sharp edges from posing a safety risk.
-
Assembling the Frame: Lay out the cut pieces on a flat, level surface according to your design. Start with the outer frame, clamping the pieces together. Check the corners with a square to ensure they are 90 degrees before welding. Weld the joints, then proceed to add support beams across the frame if your design requires them.
-
Attaching Legs: Decide on the height of your bed frame and cut the legs to size. Attach the legs to the corners of the bed frame, ensuring they are perpendicular to the ground for stability. Additional bracing may be added between the legs for extra support.
-
Finishing: Once the frame is welded and the joints are cooled, clean the metal of any debris or oil. Apply a coat of rust-inhibiting primer followed by paint or powder coating in your chosen color. This not only adds to the aesthetic appeal but also protects the frame from corrosion.
Check out Puffy mattress reviews from real customers and see how we compare with other brands.
DIY Headboard for Metal Bed Frame
Materials and Tools
- Additional metal tubing or a sheet of metal for the headboard structure.
- Decorative elements (optional), such as metal scrollwork, wood panels, or fabric.
- Bolts or welding equipment to attach the headboard to the frame.
- Paint or finish to match or complement the bed frame.
Steps to Construct
-
Designing the Headboard: The headboard design should complement the overall style of the bed frame. It can be as simple as a straight bar of metal tubing or as complex as an intricate metal lattice. Consider the height of the headboard in relation to your mattress and pillows.
-
Cutting and Shaping: Based on your design, cut and shape the metal for the headboard. For intricate designs, metal scrollwork pieces can be purchased and welded together. For a mixed-material look, cut a sheet of metal as a frame and prepare wood panels or upholstery to fit within.
-
Assembling: Assemble the pieces of your headboard. If you’re using metal tubing, weld them together. For mixed materials, attach the wood or upholstered panels to the metal frame using screws or bolts.
-
Attaching to the Bed Frame: The headboard can be welded directly to the bed frame for a permanent solution or bolted on for adjustability. Ensure it’s securely attached to prevent any movement.
-
Finishing Touches: Like the bed frame, finish your headboard with paint or powder coating. If you’ve included wood or fabric elements, treat or upholster them as needed.
Tackling the construction of a metal bed frame and a complementary headboard was an immensely rewarding project. It not only challenged my DIY skills but also allowed me to tailor the end product to perfectly suit my bedroom’s aesthetic and my family’s needs.
Adding a Puffy Lux Mattress to the mix transformed the metal frame into the centerpiece of our bedroom sanctuary, marrying industrial strength with plush comfort.
Use our store locator to find the closest furniture or mattress store near you and feel the cloudlike comfort of our Puffy Mattress in person.
Conclusion
Creating a DIY metal bed frame is a rewarding project that not only saves money but also allows you to customize your sleeping space to your exact preferences. Whether you opt for a minimalist design or incorporate storage and a bespoke headboard, the result is a unique piece that reflects your personal style and meets your needs. So, roll up your sleeves, and let’s bring your dream bed frame from concept to reality!

- Premium stitching.
- Heavy-duty wooden frame.
- Lifetime warranty.
- 101-night sleep trial.
- Free shipping and returns.


