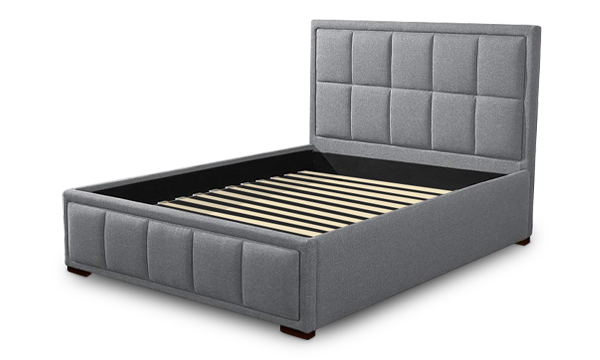
Transforming a bedroom into a personalized retreat where every furniture piece tells a story is the dream of many homeowners. Among the most innovative and captivating projects is constructing a DIY hanging bed frame—a piece that not only serves as a comfortable sleeping area but also as a statement of design ingenuity.
In this guide, we’ll explore how to bring this floating bed concept to life, ensuring a secure, stylish, and serene addition to your home.
Why Choose a Hanging Bed Frame?
- Aesthetic Appeal: A hanging bed frame adds a modern, airy feel to any room.
- Space Efficiency: Utilizes vertical space, leaving more room for other furniture or activities.
- Unique Comfort: The gentle sway of a hanging bed can enhance relaxation and sleep quality.
Materials and Tools Needed
- Sturdy Wood Planks: For the bed frame and support. The type and quantity depend on the size of the bed and the design.
- Ropes or Chains: To suspend the bed from the ceiling. Choose materials capable of supporting the bed’s weight, plus the weight of occupants.
- Drill: For making holes in the wood and ceiling.
- Heavy-duty Ceiling Hooks: Ensure they are rated for more weight than you expect the bed to hold.
- Measuring Tape: For precise measurements.
- Level: To ensure the bed hangs evenly.
- Saw: If you need to cut wood to your desired dimensions.
- Sandpaper or Electric Sander: For smoothing the wood.
- Varnish, Stain, or Paint: To finish the wood.
- Safety Equipment: Such as gloves and goggles.
Interested in how Puffy stacks up against other brands? Check out our mattress comparisons: Puffy vs Purple, Puffy vs Nectar, Puffy vs Casper, Puffy vs Leesa, Puffy vs Saatva, Puffy vs DreamCloud, and Puffy vs Tuft and Needle.
Hanging Bed Frame DIY: Step-by-Step
Step 1: Design and Planning
- Dimensions: Determine the size of your bed. Standard mattress sizes can guide you, but remember, a round or custom shape could add a unique touch.
- Sketch: Outline your design, considering the placement of ropes or chains for balanced support.
Step 2: Preparing the Ceiling
- Locate Ceiling Joists: Use a stud finder to locate joists where the bed will hang. The strength of your ceiling is crucial for safety.
- Install Ceiling Hooks: Drill pilot holes into the joists and screw in heavy-duty hooks. Ensure they’re spaced evenly according to your bed frame’s design.
Step 3: Constructing the Bed Frame
- Cut Wood to Size: Based on your design, cut the wood to create the frame. If you’re making a rectangular bed, you’ll need four planks for the sides and additional planks for support slats.
- Drill Holes for Ropes/Chains: At each corner of the frame (and possibly more, depending on size and weight), drill holes large enough for your chosen suspension material.
- Assemble the Frame: Connect the planks using screws to form the frame. Attach support slats evenly across the frame to support the mattress.
Step 4: Sanding and Finishing
- Smooth the Wood: Sand the frame thoroughly to prevent splinters and prepare it for finishing.
- Apply Finish: Paint, stain, or varnish the frame as desired. Let it dry completely.
Step 5: Attaching Ropes or Chains
- Measure and Cut: Cut your ropes or chains to the required length, considering the distance from the ceiling to where the bed will hang.
- Secure to the Frame: Thread the ropes or chains through the holes in the frame and secure them. Knots for ropes should be strong and possibly reinforced with metal clamps. Chains can be attached using appropriate fittings.
- Hang the Bed: Attach the other ends of the ropes or chains to the ceiling hooks. It’s crucial to adjust the length so the bed hangs level.
Step 6: Safety Checks and Adjustments
- Weight Test: Carefully test the bed’s stability and the ceiling’s capacity to hold the weight. It’s better to perform this step before adding the mattress.
- Level Adjustments: Make any necessary adjustments to ensure the bed hangs evenly.
After a day spent creating your masterpiece—a DIY hanging bed frame—imagine the unparalleled comfort of collapsing onto a Puffy Lux mattress.
Check out Puffy mattress reviews from real customers and see how we compare with other brands.
Safety Considerations and Tips
- Weight Capacity: Ensure the bed frame, ceiling supports, and hanging mechanisms can safely support the weight of the mattress and occupants.
- Stable Installation: Regularly check the integrity of the ropes, chains, and ceiling hooks for wear and tear.
Embarking on the DIY hanging bed frame project was a leap of faith for our family, blending our love for unique home decor with practical woodworking. The process was a bonding experience, filled with laughter and learning.
The first night sleeping on the floating bed felt like being cradled in the clouds—truly a testament to the magic of DIY and the allure of customizing our sleeping environment.
Incorporating a Puffy Lux Mattress into your bedroom setup complements the innovative design of your hanging bed frame, blending the thrill of a DIY project with the luxury of premium comfort.
Use our store locator to find the closest furniture or mattress store near you and feel the cloudlike comfort of our Puffy Mattress in person.
Conclusion
Creating a DIY hanging bed frame is more than just a weekend project; it’s a journey into transforming your bedroom into a sanctuary of relaxation and style.
With the right tools, a bit of patience, and a dash of creativity, you can construct a bed that not only saves space but also turns your bedroom into a haven of tranquility and aesthetic beauty.
Remember, the foundation of great sleep is not just about how high you can elevate your bed, but also about the quality of your mattress.

- Premium stitching.
- Heavy-duty wooden frame.
- Lifetime warranty.
- 101-night sleep trial.
- Free shipping and returns.


